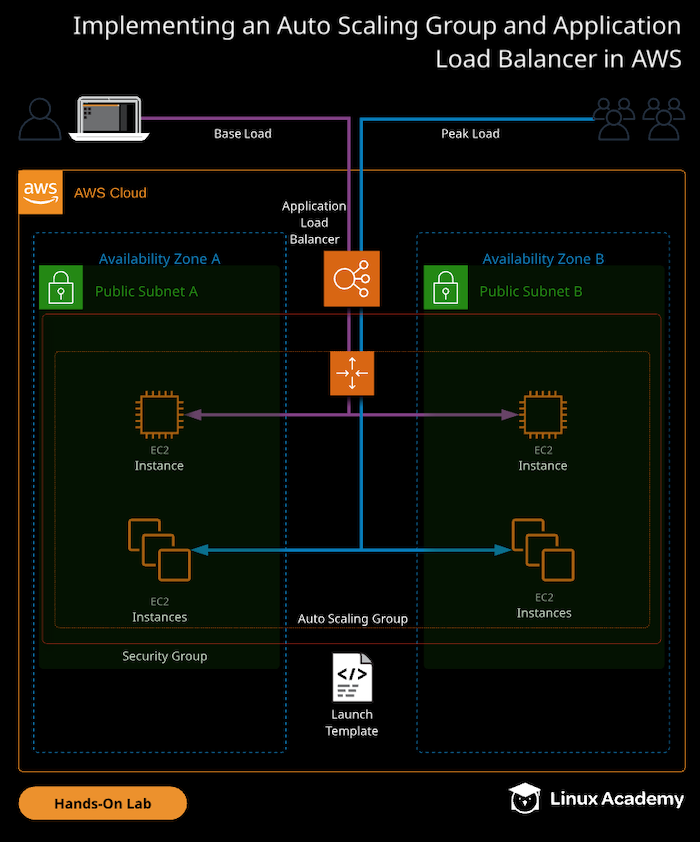
Implementing an Auto Scaling Group and Application Load Balancer
In this AWS hands-on lab, we will integrate two powerful AWS services: Elastic Load Balancers and Auto Scaling groups.
Specifically, we will create an Auto Scaling group of EC2 instances operating as web servers, and we’ll configure an Application Load Balancer to load balance between the instances inside that Auto Scaling group.
After everything is set up, we will simulate stress tests on the EC2 instances to confirm the Auto Scaling group works as expected. This experience is good practice for building highly available and cost-efficient applications on AWS.
Learning Objectives
- Create an Application Load Balancer
- Create a Launch Template
- Create an Auto Scaling Group
- Test Horizontal Scaling
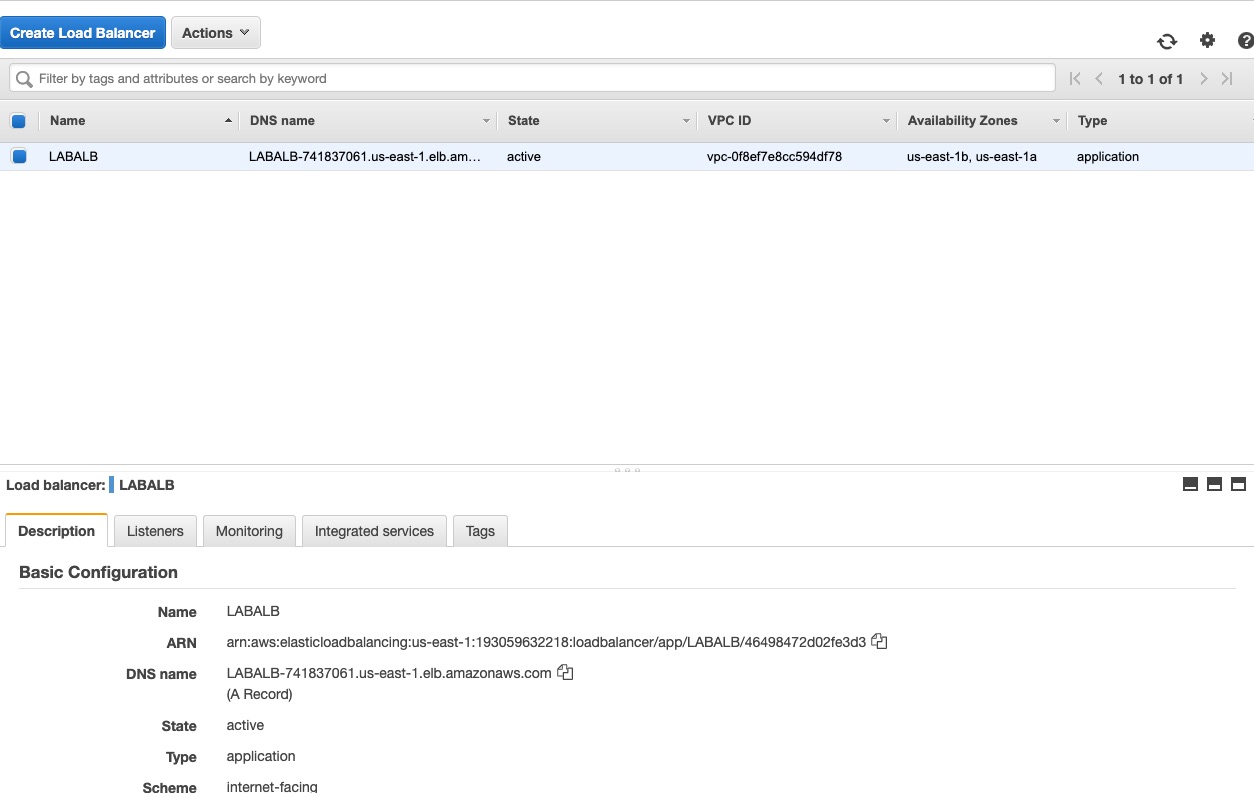
Create an Application Load Balancer
Create an Application Load Balancer to load balance between EC2 instances you will create later on inside your Auto Scaling group:
- Navigate to the EC2 portion of the console.
- Click on the Load Balancers section under Load Balancing.
- Press the Create button under the Application Load Balancer.
- Name your load balancer “LABALB”, leave the ALB set to internet facing, and set the IP address type as ipv4.
- Select the VPC, and add the
us-east-1aandus-east-1bAZs to your ALB (not theus-east-1cAZ). - Create a new security group for your ALB, and use “ALBSG” for the name and description. Configure rules ensuring HTTP is allowed from 0.0.0.0/0 and ::/0 (IPV6).
- Configure a target group for your ALB, naming it ALBTG.
- Expand Advanced health check settings, and reduce the healthy threshold check down to 2.
- Proceed to create your ALB.
Create a Launch Template
Create an SSH key pair that the EC2 instances will use to control access:
- Navigate to EC2 > Network & Security > Key Pairs.
- Click Create Key Pair.
- Call it ALBASG, and download the file to your local machine.
Create a security group for EC2 instances:
- Navigate to EC2 > Network & Security > Security Groups.
- Click Create Security Group.
- The name and description are ec2web.
- Set the VPC to the lab VPC.
- Add a rule allowing SSH from 0.0.0.0/0 and ::/0 (IPV6).
- Add a rule allowing HTTP from the Security Group ID of the ALB.
- Create the security group.
Create a launch template that will be used by the Auto Scaling group:
- Navigate to EC2 > Instances > Launch Templates.
- Create a new template, and call it “LABLT” for the name and description.
- The Source Template is none.
- Search for AMI, use the
Quick Startlab catalog, and pick the Amazon Linux 2 AMI (64-bit x86). - Set the instance type as t3.micro (not T3a.micro).
- Select the key pair created earlier.
- Network type is VPC.
- Select the ec2web security group created earlier.
- Storage should automatically be populated with a volume, so leave that as default and don’t add anything to the network section.
- Expand Advanced Details, and paste the user data for this lesson in the box.
- Click Create Launch Template.
- Click Close.
Create an Auto Scaling Group
- EC2 > Auto Scaling > Auto Scaling Groups
- Click Create Auto Scaling group.
- Select Launch Template, and choose the template you just created. NOTE: If you receive the message
No default VPC found, you can ignore it as we are selecting our VPC below. - Call the group “LABASG”.
- Start with two instances.
- Pick the VPC from the lab environment, and select
us-east-1aandus-east-1bas subnets. - Click Next: Configure Scaling Policies.
- For now, keep the group at the initial size.
- Click Next: Configure Notifications > Next: Configure Tags > Review > Create Auto Scaling group > Close.
Note: Make sure the load balancer is ready at this point.
Enable Group Metrics Collection
- Click the Monitoring tab of the ASG.
- Click Enable Group Metrics Collection.
Edit the ASG to Allow Scaling and Use the ALB
- Click Actions > Edit
- Set Max instances as 6**, click **Target groups, and pick the target group of the ALB.
- Click Save.
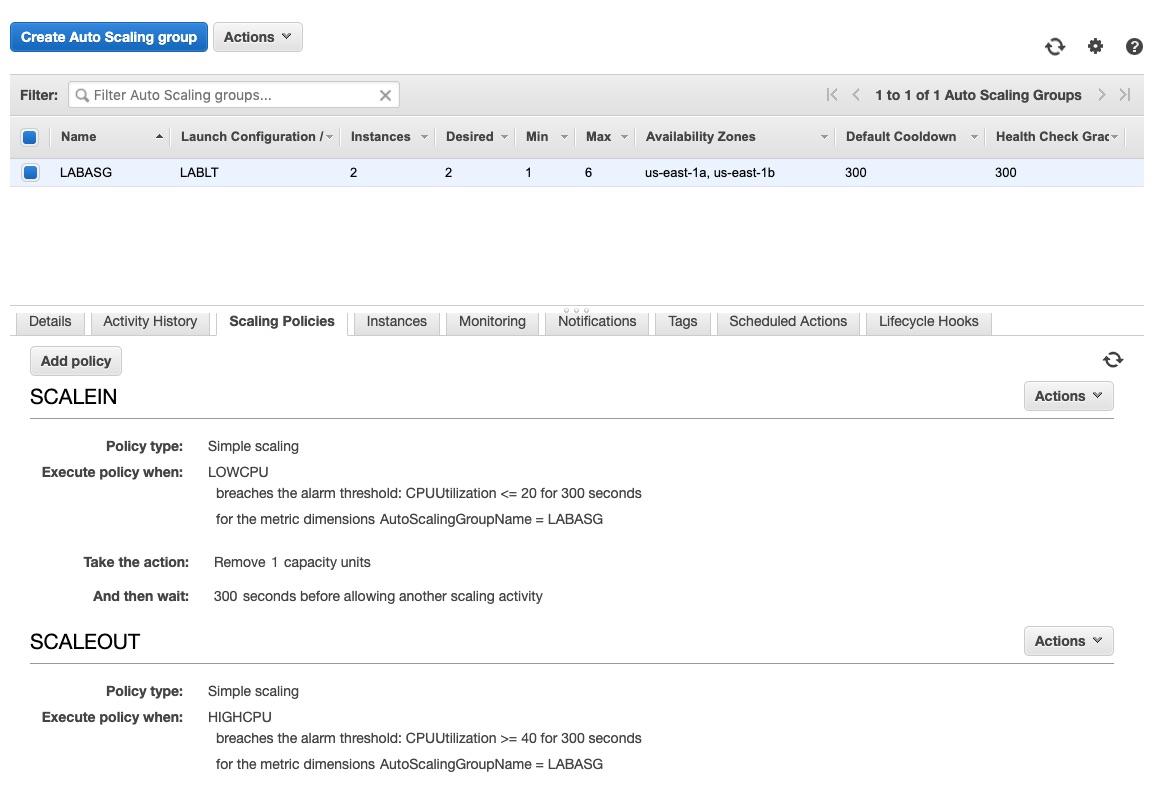
Configure Auto Scaling Group Scaling Policies
- Select the Scaling Policies tab of the ASG.
- Click Add policy.
- Click Create a simple scaling policy.
- Name it SCALEOUT, set it to Take the action to Add 1 instances, And then wait 300 seconds before allowing another scaling activity.
- Click Create new alarm, and uncheck notification.
- Average CPU Utilization is >= 40 percent for 1 period of 5 minutes. Call it HIGHCPU.
- Click Create alarm and Close.
- Click Create.
- Click Add policy again.
- Click Create a simple scaling policy.
- Name it SCALEIN, set it to Take the action to Remove 1 instances, And then wait 300 seconds before allowing another scaling activity.
- Click Create new alarm, and uncheck notification.
- Average CPU utilization is <= 20 percent for 1 period of 5 minutes. Call it LOWCPU.
- Click Create alarm > Close > Create.
Test Horizontal Scaling
-
Connect to one of the EC2 instances.
-
Install the stress test application:
sudo amazon-linux-extras install epel -y sudo yum install -y stress -
Run the stress test on the EC2 instance:
stress --cpu 2 --timeout 300(Optionally, use
3000for timeout.) -
After a few minutes, watch the number of instances increase.